Sunday, August 25, 2024

Cock-a-Doodle-Doo!

For our August challenge, Island Batik asked the ambassadors to make a mini quilt.  I enjoy mini quilts as they are a great way to try out new techniques.  I decided to use this month's challenge to finish a project I already started.  Last fall, my quilt guild offered a class with Ann Shaw.  We had our choice of a few of her patterns for the class, and I picked Gallus Gallus, which is a rooster.  I'm thrilled to finally have finished it!

photo by Nichole Witushnsky

Materials used in this project were given to me by Island Batik, Schmetz, Hobbs, Aurifil, and Oliso.


People who know me will be surprised that Ann Shaw uses a paper pieced technique.  For me to knowingly paper piece when I don't have to is rare!  But I was really interested in her technique, which involves freezer paper and a lot of marking.  I signed up and attended both days of the 2-day virtual workshop.  She has you pick out and cut your pieces and build the piece on a foam board (I bought mine at the dollar store) so you can see it all together before sewing a single stitch.  I used Island Batik scraps, mostly in purples and turquoise.  I had the rooster on the board for months, sitting in my sewing room, watching me. 

One completed rooster leg!

My son asked me for months if I was ever going to finish the rooster!  I finally assured him that I was.  The only thing I had left to do was choose background fabric.  One of my build members broke up the background by choosing a "ground" fabric and a "sky" fabric.  I liked that look, so I did that for mine.  The ground is Wicker and the sky is Thistle.  I tried a blue for the sky but didn't like it; the super pale purple of Thistle looked a lot better.  I wasn't sure I wanted a border but my son told me I did need a border.  I used the blender Marble in Blackberry for both the border and the binding, and I now agree that the border sets off the rooster nicely.  


While I don't love paper piecing, this was an interesting take on it.  The pieces went together fairly easily.  The freezer paper was easy to use.  My Oliso iron kept my fabrics on the freezer paper really well, and it was still easy to feel off when it was all assembled.  Ann was really nice and offered great tips to those of us in the class.  She kept repeating, "when in doubt, add lime green."  I'm not a big lime green person, but I tried it when I was stuck on what to use for the beak and it worked!!

I used an older Island Batik fabric from the Nappa Valley collection for the back.  The design is Wheat Field.  I thought that wheat was appropriate for a rooster!  I layered Mr. Rooster with Hobbs fusible batting and the backing wheat fabric, and I quilted in a cross-hatch design using Aurifil thread #2562 Lilac.  All piecing and quilting was done with Schmetz needles.  I added triangles on the back to make it easy to hang.  My finished mini is 19" wide by 21" high, so perfect for the "anything under 24" square" parameters of the challenge.  


I've known for months what I wanted to do with my rooster.  In February, QuiltCon was in Raleigh.  Being so close, I was able to go.  My cousin Tim, who lives in Missouri, had the good fortune of marrying a quilter, Nichole, who I adore.  Nichole and her mother Sue traveled to QuiltCon.  I've spent a fair amount of time with Nichole in the 11+ years since she joined the family, but this was only the second time I met her mother, the other being Nichole & Tim's wedding.  Sue was particularly interested in some chicken-themed quilt patterns she saw at QuiltCon, and I remember that she has several chickens.  So I really felt like the rooster was destined for Sue.  I saw Nichole last month for a family vacation and asked if giving the rooster to Sue would be weird.  Nichole assured me her mom would love it.  I was so glad!  Sue has now received the rooster and does indeed love it.  It is displayed in her home, I believe where the chickens can see it! It's always great when the right recipient of a project becomes obvious.

photo by Nichole Witushynsky

Monday, August 5, 2024

Flutterfly for a baby girl

My friend and coworker Erin recently had her first child, a baby girl named Annie.  Erin and I have worked together for 8 or 9 years.  She's always been an admirer of my quilts and I know that handcrafts in general are meaningful to her; she appreciates the time, effort, and skill that goes into them.  I've made a baby quilt for every child born to a coworker since I started working there, so Erin knew that there would be a quilt for her baby girl.

I normally choose a baby quilt completely on my own, but since Erin knew I'd be making one and I knew it would be really meaningful for her, I asked for her input.  She told me they were going with a nature theme.  She gave me some inspiration images and told me they were focusing on pink, green, and cream.

It didn't take me long to settle on the pattern Flutterfly by Laura of Slice of Pi Quilts.  I've had my eye on this pattern for a while.  I've made Laura's Exploding Heart quilt before, and Flutterfly is similar in construction. I was worried it would be too big for a baby quilt, so I made it with smaller units.  Laura is open that Flutterfly (and Exploding Heart) can be cut with Accuquilt's quarter square triangle die.  Instead of using the size in the pattern, I used the die for units finishing an inch smaller. I planned to add in the borders at the top and the bottom, but ultimately left them off.  The pattern is well written and is great for chain piecing.

The fabrics in the top are all Island Batik.  I used as many different pink fabrics as I could find in my various Island Batik scrap bins.  I picked 2 green fabrics for the butterfly body, and the background is Milkshake, which has a nice creamy look to it.


I recently visited a fairly new local-ish quilt shop for the first time, SewEndipitous in Rock Hill, SC.  While there, I looked for a fabric to use as the back.  I picked a Lewis & Irene fabric with hummingbirds and hibiscus flowers.  I wanted something that wasn't directional and would go well with a bright pink binding.  I really like it, and it turns out that the dad-to-be's grandmother was a huge fan of hummingbirds.  When Erin got the quilt, she was thrilled to find "Nana Birds" on the back.  A serendipitous choice, for sure!


Erin absolutely loves the quilt, and I hope baby Annie gets years of fun and comfort from it.


Tuesday, July 30, 2024

Red Sparkle

Two weeks ago, my family went to the local minor league baseball game.  While there, we ran into the principal of Fire Monkey's school, Ms. L, who was there with her daughters.  Seeing Ms. L reminded me that I still hadn't posted two of last school year's teacher quilts, including the one for Ms. L!

If you don't know what I mean by Teacher Quilts, every year I make quilts for my son's teachers.  My son, called Fire Monkey on the blog, is currently 10 years old and just finished 4th grade.  He is in a dual language school, so he has two teachers each year, one for English (and social studies and health) and one for Spanish (and math and science).  I've also done quilts for the Specials teachers like Art, PE, & Music, knowing that those teachers often get overlooked.  Fire Monkey asks each teacher their favorite color at the start of the school year, I get busy sewing, and we gift them during the last week of school.

a peak at the backing

We were at an event at the school at the beginning of last year and got to talking to Ms. L, who is always at every school event.  I realized she hadn't yet gotten a quilt so we added her to the list for the 2023-24 school year.  Fire Monkey was able to find out a few weeks later that Ms. L's favorite color is red. Truth be told, I struggle with red quilts.  I think it's because I like scrappy, and there just aren't that many shades of red.  Too light and it's pink.  Too dark and it doesn't feel like red anymore either.

block as created for SAHRR 2024

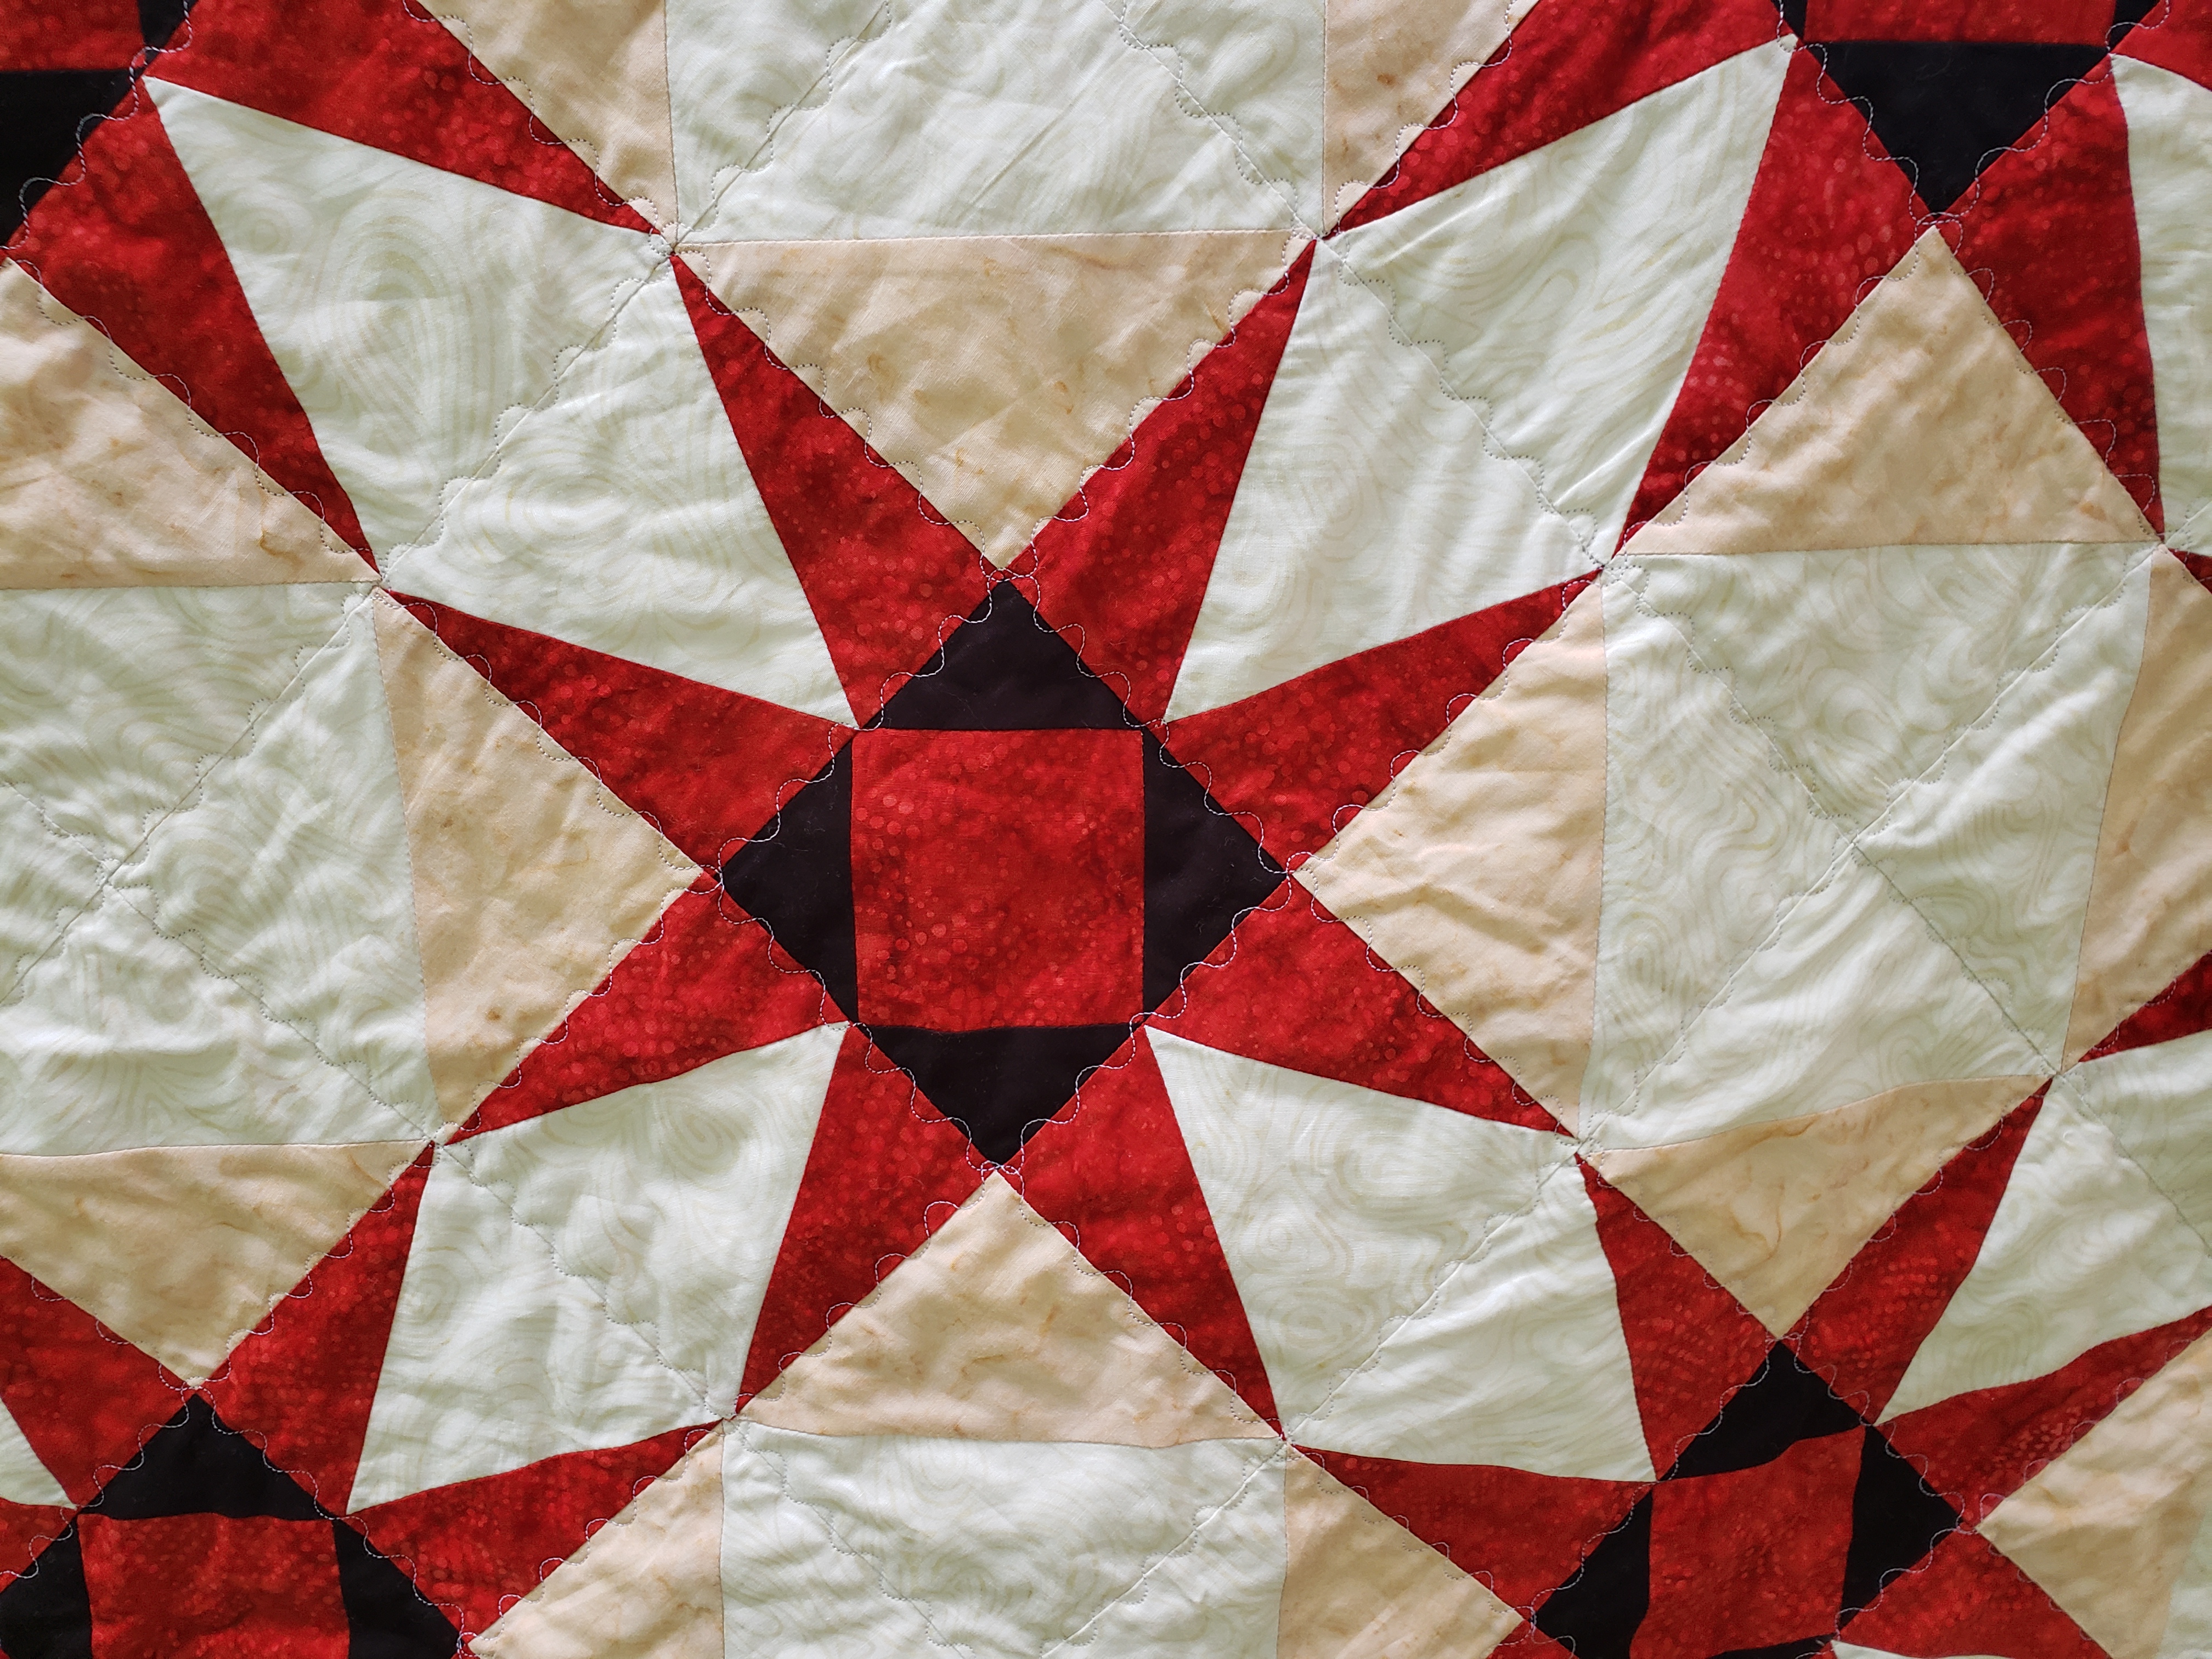
I struggled with what to make and this was the last one/last pattern I decided on this year.  Finally I picked a block I designed for my SAHRR that I really liked.  I set it on point for visual interest.  I cut everything with my Accuquilt.

I used four fabrics, all from Island Batik.  The background is Milkshake, the light triangles are Shell, the main red is a red blender that I don't know the name of, and there's a bit of solid black.  I'm happy with how it turned out!

Monday, July 29, 2024

Island Batik Unboxing #2

One of the most exciting days of the year for an Island Batik Ambassador is the day our boxes arrive.  We get generous shipments twice a year.  I am excited to show you what I will be working with for the second half of 2024!

You can see my unboxing video here.  If you want more details or if you simply dislike videos, read on for descriptions of what was in my box.


First, I have half yard cuts of the full collection of Geometric Symphony.  This is one of the new collections that will be hitting stores around September.  Geometric Symphony was designed by Jerry Khiev and has bold geometric designs in magenta, purple, and gold. All the newest collections will be featured in a September blog hop.

Next I had a 10" stack of another of the upcoming collections, Floral Fun.  I love the greens and purples in this!  Floral Fun is a signature collection for Terri Vanden Bosch of Lizard Creek Quilting, designed by Kathy Engle.  I also received coordinating yardage from Island Batik's always-available Foundations: Whip Cream and Cheerio in Navy.


Speaking of the Foundations fabrics, I was sent a bundle of 12 half-yard cuts that coordinate with Geometric Symphony and my Surprise bundle that will be revealed in November.  These Foundations have 3 families: Basics (Shell, Oatmeal, Steel, and Twilight) , Blenders (Marble in Frog, Wavy Dots in Bluebird, Bubbles in Raspberry, and Small Petal in Purple), and Solids (Cobalt, Pink, Green, and Lime Green).


I also have two of the Gradations collections, which are Basics put together in color families.  I have a strip pack of Opulent Orange and a 10" stack of Precious Pinks.


Next were 2 packages of Stash Builder strips.  These are 5" by width of Fabric and area great for a variety of projects.  I enjoy that you can get a nice variety of colors in each package.


I also got fabrics to use as background.  There are 4 yards each of white, black, and dark gray solids, as well as 6 yards of Sprinkles.  I have had Sprinkles before and it's a great background, not quite bright white with little dots in it. 

Industry partner Aurifil sent 5 colorful spools of 40 weight thread.  These specifically coordinate with Geometric Symphony for use in the September challenge.


Hobbs Batting sent a wide variety of batting, including silk batting, Thermore thin polyester batting that I love for wall hangings, and their fabulous black batting that is great for quilts with dark backgrounds.

And finally, there was a kit to make the By Annie pattern of my choice.  I am making the Totally Trendy Totes pattern, which makes a tote bag in 3 sizes.  I have fabrics from the Flower Pot and Daisy May collections, plus the pattern and all the other supplies I need to make these fabulous totes!  It was the By Annie challenge in 2020 that taught me that I really can make bags when I use Annie's patterns, and now it's one of my favorite challenges all year.


I'm so excited to play with all these beautiful fabrics!  Stay tuned for the second half of 2024 to see them in action! 


Friday, June 28, 2024

Create for a Cause

June's Island Batik Ambassador challenge is to create for a cause.  We are each tasked with making a twin-bed sized quilt for Quilts Across America, an initiative within Sleep in Heavenly Peace.  Sleep in Heavenly Peace believes a bed is a basic need for all children and works to make sure that no kid sleeps on the floor in our town.  Quilts Across American aims to provide a quilt with each bed that is delivered.

Each of us was sent a tool from Deb Tucker's Studio 180 Design and tasked to make a simple quilt with our tool.  We are also encouraged to use an additional Studio 180 Design tool if we had one.  Quilts could go to children ages 2-17, so we are to use fabric that will appeal to any age group in that age range.

 
Materials used in this project were given to me by Island Batik, Studio 180 Design, Schmetz, Hobbs, Aurifil, and Oliso.


All of Deb Tucker's Studio 180 Design tools are designed to make units that are slightly oversized so that you can trim to perfection.  You are able to make a variety of sizes with each tool.  I was sent the Tucker Trimmer.  The Tucker Trimmer makes half square triangles, so that meant lots of design possibilities! I played around with many options.  Ultimately, I went back to a block I created for my Stay at Home Round Robin project earlier this year.  The block also has flying geese units and I have Studio 180's flying geese tool, called the Wing Clipper, so I would be able to use both tools.  My block for the SAHRR quilt also had a square-in-a-square center, we were told to keep these designs simple and use no more than 2 tools, so I simplified to a solid center square.

block mock-up from EQ8

In my January ambassador box, I had the Fire and Ice collection by Claudia Pfeil.  I was also sent the always-available blender fabric Dandelion in Black.  Fire and Ice has a lot of shades of reds and oranges with shades of gray and off-white.  All 20 fabrics from Fire and Ice are in this quilt. I used solid gray as the background and chose that Dandelion in Black as the center of blocks and the sashing cornerstones.  I feel like these are good angsty teen colors.  


Our requirement was to make at least 30 of the units our tool is designed for.  Each block has 4 half square triangles and there are 18 blocks, so that's 72 HSTs.  Additionally, there are 8 flying geese in each block, so that's 144 flying geese!  You can make this block any size.  The one in my SAHRR was a 12" finished block.  Based on the Fire & Ice fabric I had to work with, the blocks for this quilt are 9" square. I did both he piecing and quilting with Aurifil #5004 Grey Smoke.  The batting is Hobbs cotton batting with scrim.  Everything was stitched with Schmetz needles and pressed with my Oliso iron.  

This finishes at 52" x 76".  I hope it brings someone a good night's sleep!


Sunday, May 26, 2024

Scrappy Joy Blooms

It's the end of the school year, so I am finishing up this year's teacher quilts.  Music teacher Ms. B said "all the colors" when asked her favorite color.  I was browsing older issues of Make Modern magazine looking for inspiration when I saw Joy Blooms by Katy Devlin in issue #22.  It was a neat looking block.  I saw reading through the instructions that it was paper pieced, which I hate, but in looking at the diagram I realized that I could cut it with my accuquilt cube and use traditional piecing.  Score!


I used my 6" cube and each block is 15" finished.  I wanted mine to have a really scrappy, colorful look.  I selected 3 fabrics for each block using my Island Batik scraps, aiming for fun fabric combinations and an over-all broad use of a lot of different colors.  I eliminated the sashing between the blocks from the original pattern though I did add a skinny border on the outside to give a little visual distance from the blocks.

With scrappy quilts I love to use a scrappy binding.  I keep all my binding remnants and I separate out those from Island Batik fabrics.  I got out my bag of leftovers to see what I had and pieced them together to get to the length I needed.  There are 14 different binding leftovers in this quilt!  I love cleaning out my leftovers!
 

scrappy binding ready to go

I like the orignal pattern name of Joy Blooms so I am just adding the word "scrappy" to it to indicated that these are scrappy blooms of joy. I'm pleased with this as a colorful and scrappy quilt.  I hope it succeeds in having all the colors! 


Wednesday, May 15, 2024

Winter Nap: a paper pieced celebration

Welcome to my stop on Island Batik's Paper Pieced Celebrations blog hop!  The ambassadors were each sent one of the newest Island Batik fabric collections and tasked to use paper piecing to create a quilt that was a celebration of some sort.


My fabrics are the beautiful Peppermint Sprinkles collection, designed by Kathy Engle for Heidi Pridemore of The Whimsical Workshop.  I was so excited to get Peppermint Sprinkles, it's the collection I was most hoping for!  I love the red paired with the cooler aqua and light teal, and the winter theme with motifs of snowflakes, deer, pine branches, and reindeer.  The celebrations part of the challenge would be easy, as clearly this would be a celebration of winter. 


I do not enjoy paper piecing, so I was having some trouble deciding what to make.  Then I happened to see an issue of the British magazine Love Patchwork & Quilting at a local quilt shop.  (Issue #127)  This magazine always has some sort of extra packaged with it, and this particular issue had a bonus pattern booklet of 8 animal paper pieced designs.  The inset showed a few of them, including a penguin taking a nap under a quilt.  I snatched that issue up and impulse-purchased it for that bonus pattern!  Penguins would go great with the winter theme of Peppermint Sprinkles!

a single sleeping penguin

I took the pattern booklet home and looked at what I had gotten myself into.  The penguin wasn't going to be *too* many pieces to paper piece, and the quilt part of the block was traditionally pieced.  The original block has a fish sleeping with the penguin but I took out the fish to just focus on the penguin. I decided on a layout of nine penguins.  I used Island Batik's solids for the actual paper pieced penguins: Turquoise for the background, White and Black for the penguin head, and Orange for the beak.  


My friend and fellow Island Batik Ambassador Gail of Quilting Gail knew of my dislike of (foundation) paper piecing and offered to do a zoom call to show me her method of paper piecing without actually sewing on the paper.  I did find her method easier and less terrible than the way I had been paper piecing, though saying I like it now would be an overstatement.  Gail also has Peppermint Sprinkles for this challenge, be sure to visit her and see what she made with these fun fabrics!


back side with interfacing over the eye stitching

The pattern calls for embroidering the sleeping penguin eyes.  I used blue embroidery thread for this, and then used small scraps of fusible interfacing from making By Annie bags to seal the back of the embroidery, in hopes of  securing the stitches.  Funny moment: I had multiple conversations with my husband about the penguins, especially the eyes.  I thought each conversation included the fact that these were sleeping eyes.  Turns out, he thought the penguins were not napping, but holding up the quilts they made!!!!!  How funny is that?!?!  I guess he is just used to a lot of holding up of quilts! 😀


While most of the paper pieced quilts for this hope are foundation paper pieced, we could use either foundation paper piecing or English paper piecing.  I knew I could never do enough English Paper Piecing for a lap-sized quilt, but I really wanted to add some.  I played around with classic hexagons until I got a decent snowflake.  I thought the snowflakes would make a really fun border for the penguins, and would let me use more of the Peppermint Sprinkles fabrics.  I made four EPP snowflakes for the corners, then used my Accuquilt to cut snowflakes to fill in the rest of the border.


Items used in this project were give to me by Island Batik, Aurifil, Schmetz, and Oliso.

I used Aurifil's invisible thread to stitch the EPP snowflakes to the background.  I also used the invisible thread to applique the other snowflakes. As always, I did all the stitching with a Schmetz needle. Schmetz vinyl needs also do really well stitching through fusible web for applique.The piecing was done with a gray Aurifil thread.  My new Oliso iron got all my pieces nice and flat.


For the first time in my six years as an Island Batik Ambassador, I have only a quilt top to show you.  I really, really think that this quilt needs snowflake quilting, so I plan to send it out to a longarmer.  Don't you think snowflakes will look amazing with this??  I am debating Black vs Turquoise for the binding, let me know your thoughts!


Part of this challenge's brief was to be a celebration.  I like to think of these penguins as taking a winter nap on the shortest day of the year--Winter Solstice.  So this is a celebration of winter, of winter solstice, and of naps!  I'm calling it Winter Nap.  I plan for this to be a couch cuddling quit for my family.  We are biathlon fans and the past two years, have watched the full biathlon season.  A quilt with snowflakes seems perfect for watching a winter sport.  Winter nap measures 77" x 66".


If this is a blog hop of celebrations, what better way to celebrate than with a giveaway!  I have put together a prize package including:

  • a spool of Aurifil invisible thread, just like the thread I used for the snowflake applique
  • a package of Schmetz needles
  • a Schmetz quick pocket reference guide
  • a Schmezt photo chart of their different types of needles
  • magnetic pin cushion
  • Island Batik button

To enter, leave me a comment.  I'll pick a winner randomly on Friday May 24th.  You can comment on anything, but if you need a prompt, here are two possibilities:

  • What is your favorite thing about winter?
  • Do you think I should use Black or Turquoise for the binding on Winter Nap?

Thank you to Island Batik for another fun blog hop!  Be sure to check out all the beautifully Pieced to Perfection Celebrations!  You can find the full schedule here