Showing posts with label not a quilt. Show all posts

Thursday, June 19, 2025

My Funky Friend Ben

This month, Island Batik Ambassadors are tasked with making a friend--a Funky Friend!  Funky Friends Factory is the crafty business of Pauline, who lives in Australia.  Pauline designs patterns for making soft/stuffed toys.  We were able to pick the toy of our choice and Pauline generously sent us that pattern.  There are a lot of Friends to choose from!  I've made several Funky Friends before but never a teddy bear.  I chose Ben the Beginner Bear.  


The products featured in this post were given to me by Island Batik, Funky Friends Factory, Hobbs, Schmetz, Aurifil, & Oliso.


I knew that Ben would end up belonging to Fire Monkey, so I let him pick the fabric.  His favorite color is red.  We ended up with Imperial for most of Ben's body and Shell for the tummy and face, both from Island Batik's Ravishing Reds in the always-available Basics line.  


One of Ben's main features is that he has a large tummy area with no seams, perfect for those who want to add embroidery to their bear.  When we visited family in Portland over Christmas, we went to a store called Daiso, referred to by my family as a Japanese-style dollar store.  One of the things we bought there was a cute little firetruck patch.  Fire Monkey is still crazy about all things fire truck and firefighter.  I didn't think he had used the patch on anything yet, so I asked him about it.  He was enthusiastic about using it for Ben!  It's an iron-on patch; I ironed using my Oliso mini-iron, then stitched around it twice using Aurifil thread and a Schmetz microtex needle.  


firetruck patch on the belly piece

Pauline's patterns are clear and easy to follow.  She has a blog post for each pattern that shows the visuals for each step.  (There is a link for the step-by-step tutorial in the pattern.)  She also has detailed tutorials for some of the tricky parts in making toys, like installing safety eyes or making perfect feet.  

ready for stuffing!

I printed the pattern pieces onto freezer paper that can go into the printer.  I learned about this product from Kathleen and it makes the process so much easier!  Plus the pieces are reusable!  I saved them all in a large envelope so I can make another Ben whenever the mood strikes. Hobbs Batting generously sent me a bag of their Simply Stuffing 100% polyester filling for toys.  This is probably the best toy stuffing I've used!


Pauline has so many different animals to choose from!  Here are the other Funky Friends I've made with Island Batik Fabrics over the years:

Ollie the Laid Back Owl 


Puppy Pete

Slowpoke the Sloth


William Whale


Sunday, April 28, 2024

Funky Friend Puppy Dogs

This month, Island Batik joined with Funky Friends Factory for the ambassador challenge.  Pauline, the force behind Funky Friends Factory, is an Australian designer who designs the absolute cutest stuffed toy patterns.  She has so many fantastic patterns that it was hard to choose one!  Ultimately I chose Puppy Dog Pete. He's just so cute!!!  I made two puppy dogs.

Truth be told, I struggle with projects that are 3-dimensional, especially stuffed toys.  But Pauline really sets up her Funky Friend patterns up for success.  The patterns are broken down into small steps, and she has a photo tutorial for each Friend that shows in details what it should like. 

Candy Liver

Materials used in this project were given to me by Island Batik, Funky Friends Factory, Aurifil, Schmetz, Oliso, and Hobbs.


Violet the Purple Puppy

I did one thing different than the pattern--I really wanted the ears to have some padding and not just be fabric.  I used scraps of Hobbs fusible batting and fused it directly onto the wrong side of he ear pieces.  I cut the batting pieces without a seam allowance, so that the extra thickness wouldn't be in the seams.  I'm pleased with how that worked!  It did make turning the ears right-side out a little more difficult, but it was worth it!

ears with Hobbs fusible batting
 
Fire Monkey has named the green puppy Candy Liver. (It comes from a mis-hearing of his dad talking about cantilevers.)  His body fabric is from an older Island Batik collection Lemongrass.  I'm not sure which collection the blue contrasting fabric for the ears, nose, and tail came from, but it's the prefect compliment to the blue spots in the Lemongrass fabric.  Candy Liver's friend is Violet the Purple Puppy.  Her main fabric is Purple from the always-available Basics collection, and her nose and ear fabrics are from last year's English Lavender collection.  I stitched both puppies with schmetz n #2783 Medium Delft Blue for all the sewing machine parts, but used color specific for the hand stitching after stuffing:  Aurifil #2884 Green Yellow for  Candy Liver and Aurufil #2545 Medium Purple for Violet.  I started the puppy project with a brand new Schmetz microtex needle.


Violet's head in process

I have made a few Funky Friends in the past but I had one new trick this time: printing the pattern pieces onto freezer paper that can go into the printer.  My friend Kathleen of Kathleen McMusing recently mentioned these papers to me, and man, did they make the process easier!  I printed Puppy Dog Pete's pattern pieces (say that 5 times fast!) directly onto freezer paper, then used my Oliso iron to iron the pattern pieces directly onto the fabric for cutting.  So much easier than tracing!!  I still had to transfer the pattern markings, but that's not nearly as time consuming. 


I am really happy with our new puppy pals!  Thank you, Funky Friends Factory, for a pattern that made us new huggable friends!


Friday, December 9, 2022

Lone Star Jacket

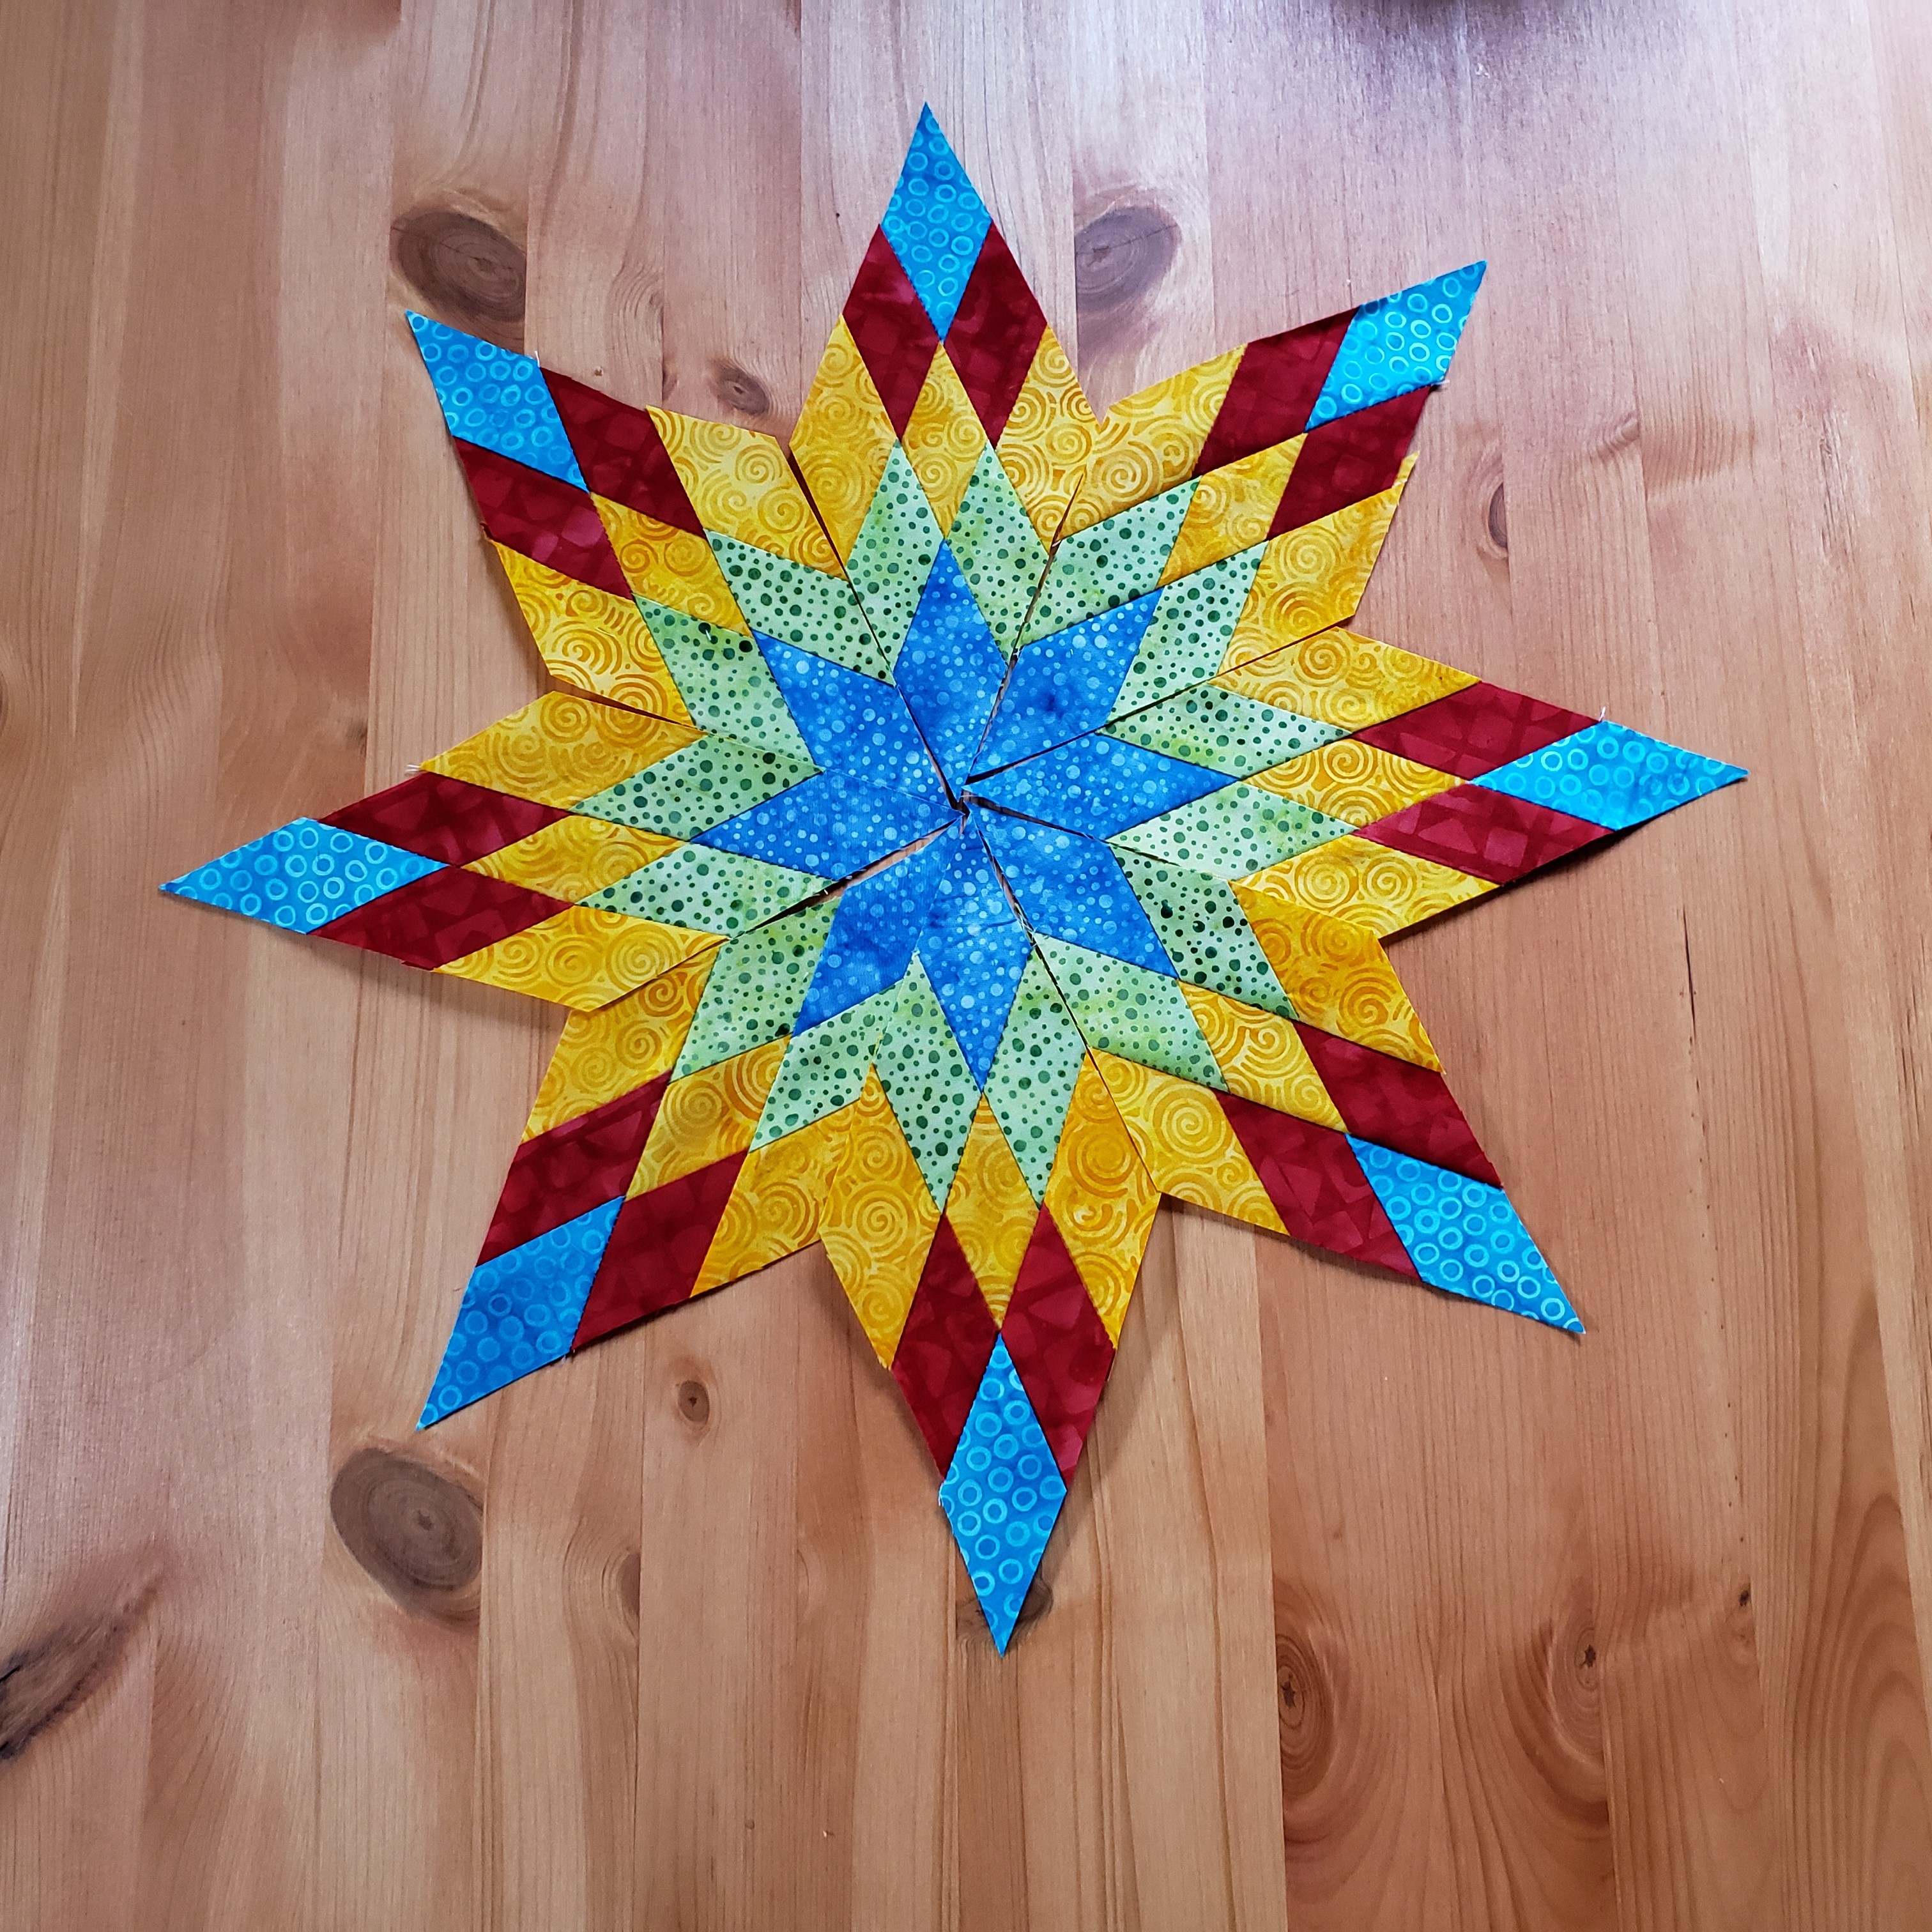
Quilt Coats are quite the trend right now, even beyond the quilting world.  I don't normally care about fashion trends, but I do like the idea of a quilted coat or jacket.  Problem is, I have zero garment-making skills.  I have tried and the results have not been good.  I have wondered if I could go the sweatshirt-turned-into-a-quilted-jacket route, and have watched this tutorial with Edyta Sitar several times for the method.  When I learned that one of the Island Batik challenges was the Lone Star, I thought a lot about making a quilted jacket using a sweatshirt for the challenge since a Lone Star would look fabulous on the back of a jacket.  Ultimately, I decided it was too risky and moved on to design a Lone Star quilt.


But I couldn't get the idea of a Lone Star on the back of a jacket out of my head. Jordan Fabrics has a tutorial for a smaller Lone Star, and I thought if I made the strips narrower, the Lone Star might be small enough to fit on my back.  So once I had chosen my fabrics for Crayola Explosion, I looked at the fabrics I hadn't used and tried to find a combination of 5 fabrics that I liked.  I ended up repeating two fabrics.  I decided to applique the star to the back of a denim jacket.  My biggest problem was that I really didn't want raw edges.  I bought some skinny pre-made bias binding and used that to encase the edges.  That worked well.


My plan is to keep this jacket at work so I have something to throw on when I'm cold.  With the variety of colors, I figure I can wear it with anything.  The fabrics are Island Batik, of course, from the Chickadee collection, and I did use Aurifil thread and Schmetz needles.  I've worn it at work a few times now and gotten many comments on it.  I'm pretty happy with it, and I love that I can kind of hop on the Quilt Coat bandwagon without needing to make the garment!  


If you like the Chickadee fabrics, I have a giveaway on this post until December 23rd to win a set of 2 1/2" strips from the collection--it's not a full jelly roll, just one each of 18 fabrics from the collection, but there are lots of bright colors.  


Monday, November 14, 2022

Creative Christmas Stockings with Island Batik

November's Island Batik Ambassador challenge is creative Christmas stockings.  We were to make a stocking, and that was the only directive; it could be any color or design we wanted.  Some challenges, I immediately have ideas while others need time to percolate.  This was one of the times that I needed time to ponder the possibilities.


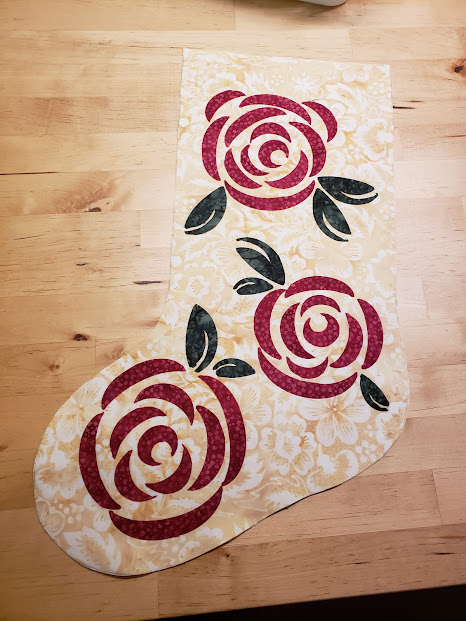
Unrelated, back in September, I saw a block that Laura of Slice of Pi quilts designed for Island Batik's Woodcut Blossoms line.  She called the block Woodcut Roses and I absolutely loved it.  It wasn't too many days after I fist saw Woodcut Roses that I realized those flowers would look stunning on a Christmas stocking. I had the prefect fabric, too, leftovers from Woodblock Bouquets, a signature collection earlier this year for Carol Moellers that includes deep red-pinks, dark greens, and golds.  Perfect for a Christmas color palette!

applique laid out on the stocking

I selected a lovely cream from Woodblock Bouquets as my background.  I used Heat-n-bond Lite for the flower pieces.  When I was happy with the layout, I fused them in place  Then I layered the stocking with Hobbs Thermore batting, a thin polyester batting perfect for small projects and stitched a small cross-hatch with Aurifil Thread color 2000 and a Schmetz mircotex chrome needle.  Since the flower pieces were fused on and the stitching is pretty close together, I didn't do any additional stitching around the applique shapes.  I used Island Batik's solid white for the lining of the stocking.


layering with Thermore

You can still download the free Woodcut Roses pattern at the Slice of Pi Quilts website.  Laura made a beautiful table runner with hers, if you are looking for other ideas. 

Stocking back     


layered together


Ta-da!  Finished stocking!

We haven't started decorating for Christmas yet so I tried to get a picture of the stocking hanging over my fireplace, but it looks empty without other decorations or stockings to keep it company.


Be sure to check out all the Island Batik Ambassadors to see their creative Christmas stockings!  There have been some really fun ones, and the month is only half over!

Brenda Alburl ~ Songbird Designs Megan Best ~ Bestquilter Pamela Boatright ~ Pamelaquilts Elizabeth DeCroos ~ Epida Studio Jennifer Fulton ~ Inquiring Quilter Preeti Harris ~ Sew Preeti Quilts Mania Hatziioannidi ~ Mania for quilts Jane Hauprich ~ Stitch By Stitch Custom Quilting Reed Johnson ~ Blue Bear Quilts Connie Kauffman ~ Kauffman Designs . Emily Leachman ~ The Darling Dogwood Denise Looney ~ For The Love Of Geese Leah Malasky ~ Quilted Delights Maryellen McAuliffe ~ Mary Mack Made Mine Anorina Morris – sameliasmum.com Lisa Pickering ~ Lisa’s Quilting Passion Claudia Porter ~ Create with Claudia Gail Renna ~ Quilt Haven Threads Brianna Roberts ~ Sew Cute And Quirky Michelle Roberts ~ Creative Blonde Gail Sheppard ~ Quilting Gail Andi Stanfield ~ True Blue Quilts Sandra Starley ~ Textile Time Travels Jennifer Thomas ~ Curlicue Creations Suzy Webster ~ Websterquilt


Wednesday, November 2, 2022

Gotham Quilts has created a panel of six fun pillows to celebrate their love of New York City.  The panel coordinates with their My NYC fabric line, which I was pleased to sew with over the summer.   While of course you can use the pillow panel to make pillows, Jennifer of Dizzy Quilter is hosting a blog hop showcasing some other uses for these fun motifs.

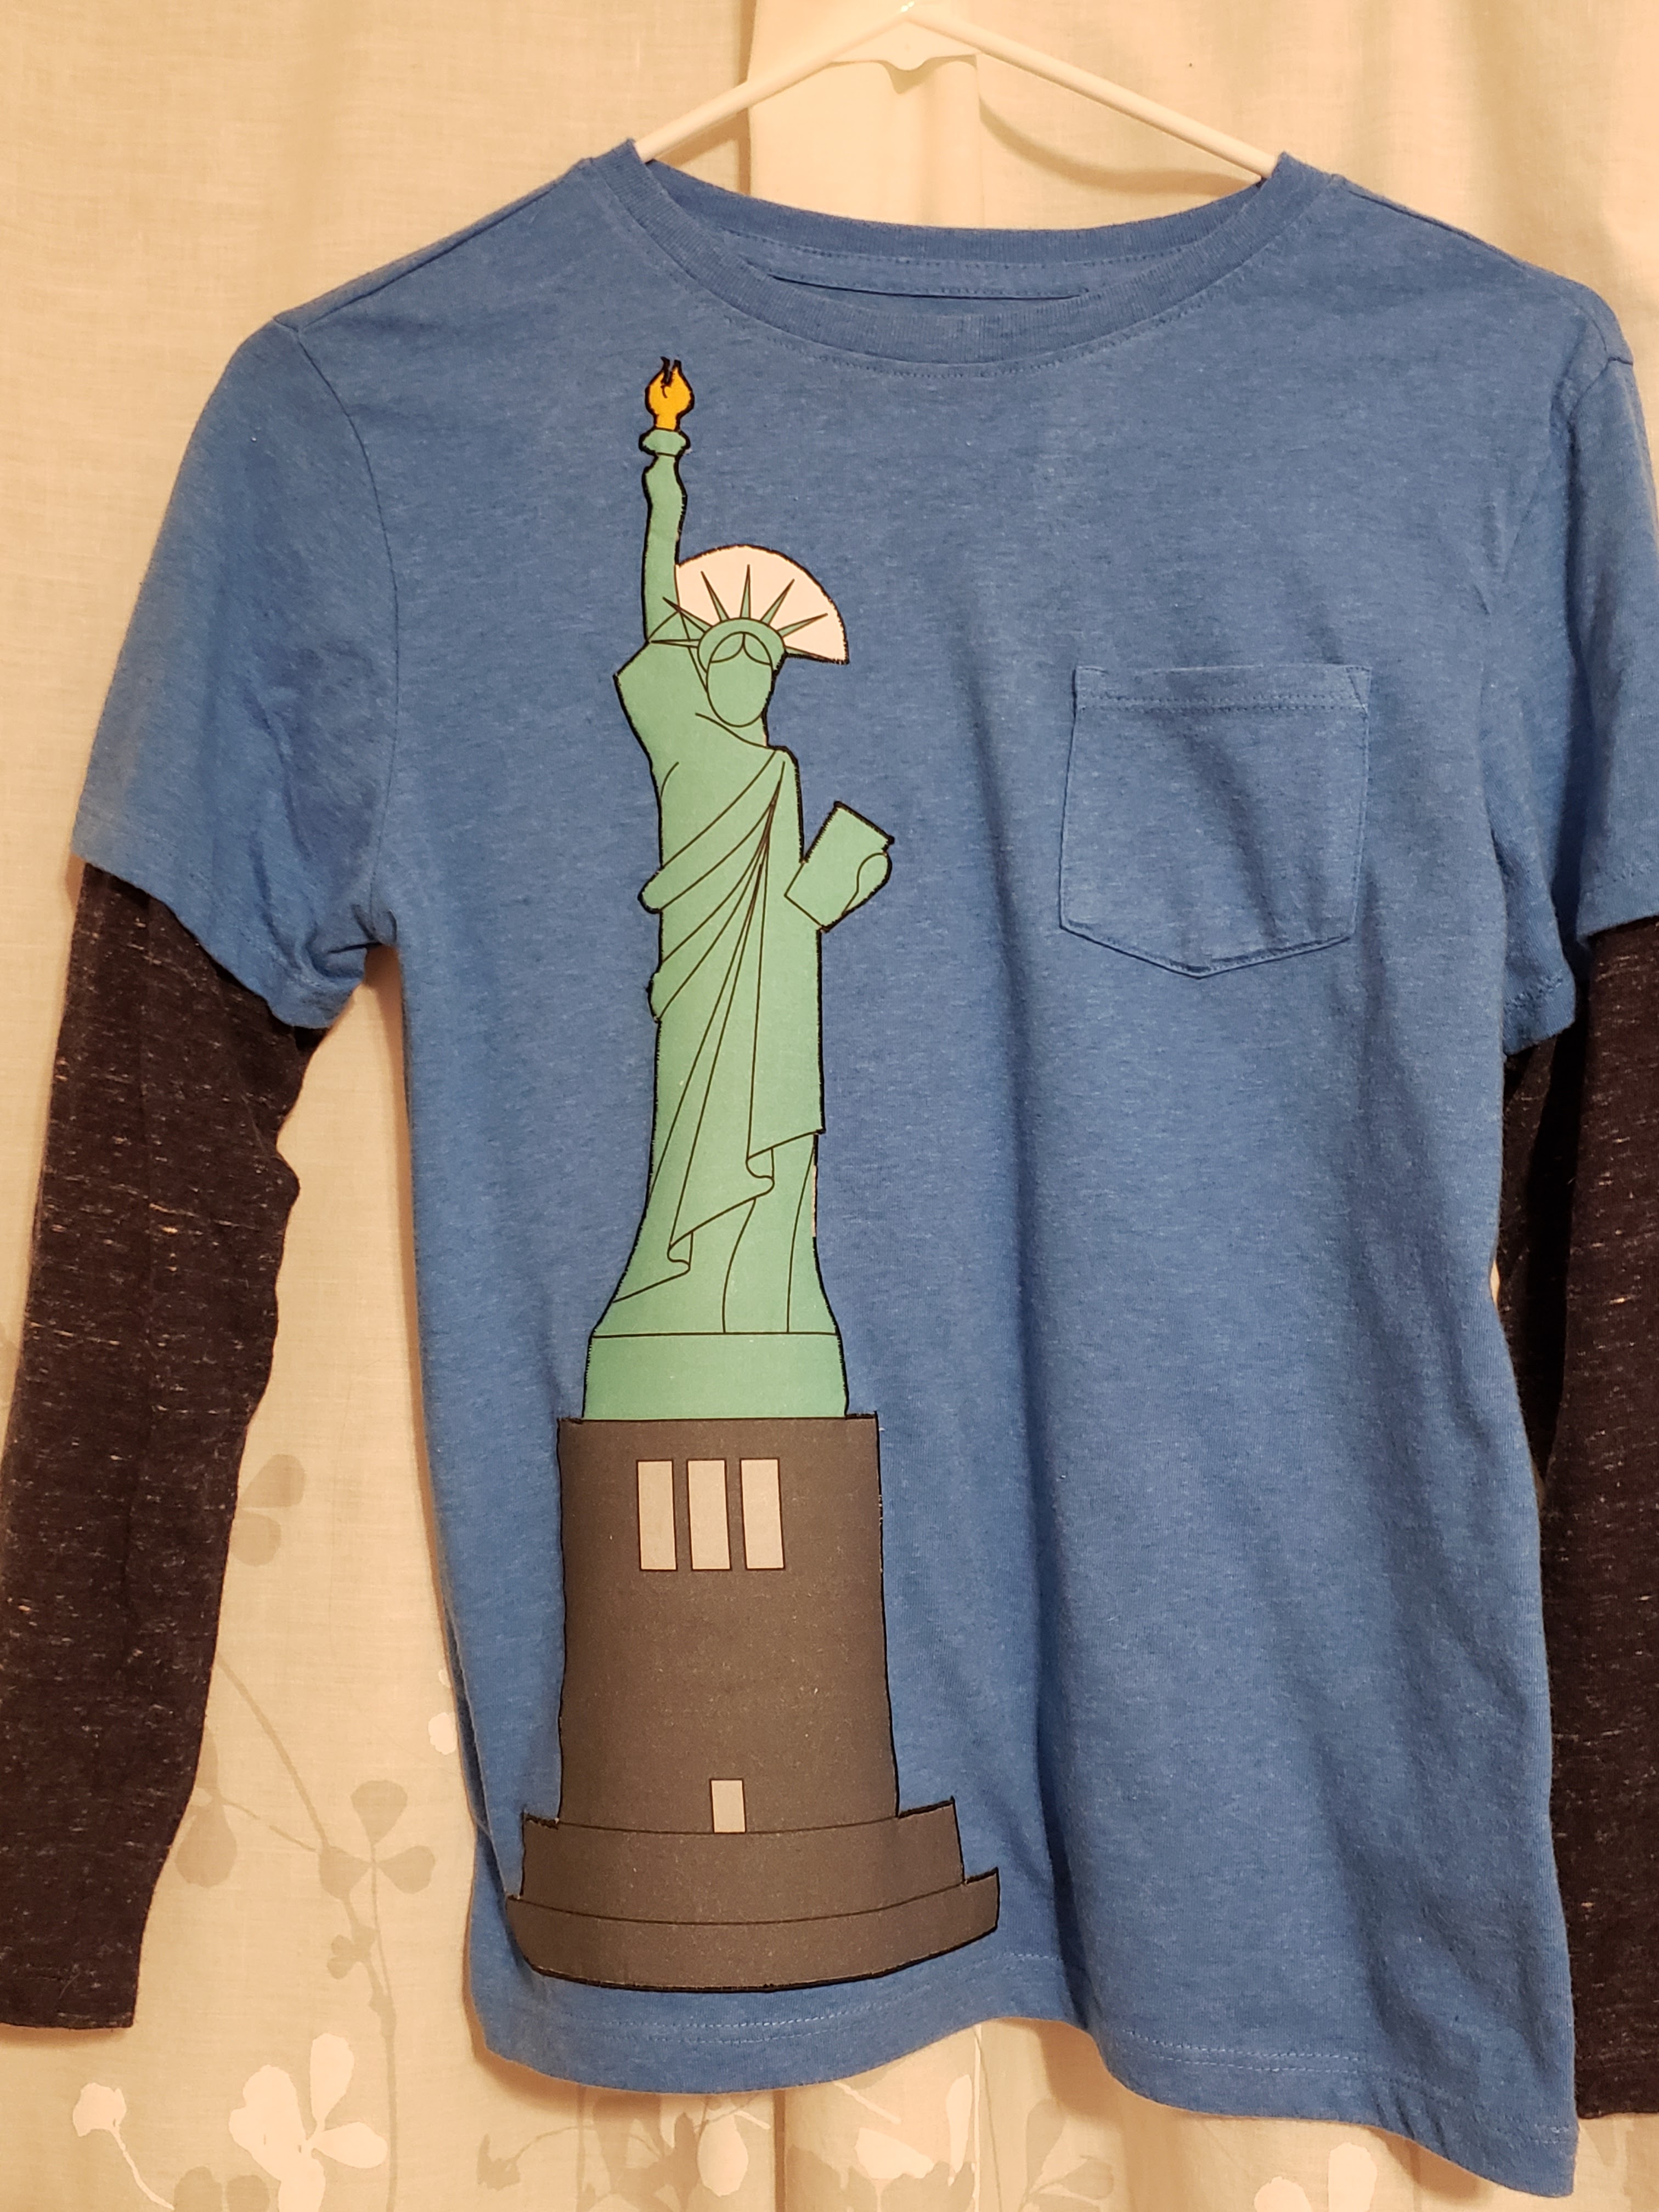
I admit, my idea is not super original.  My son has recently started asking to visit New York City and I knew he'd love an NYC-themed shirt.  He has always loved different vehicles, so I knew I'd make one with the taxi.  When I showed him the images, he also liked Lady Liberty.  I bought 2 long-sleeved shirts from Target.


The process for these was not difficult and I didn't really stop in between steps and get many photos.  I rough cut about a half an inch outside the design, I ironed the image onto some Heat-n-Bond Lite, and then I cut carefully cut out the shape. 

rough cut, before fusing

Being sure to only have the top of the shirt on the ironing board, I fused the image onto the shirt, then used a narrow satin stitch to secure it to the shirt. 


Admittedly, these images are fairly large.  I think they'd fit better on clothes for larger people; my son is on the small side for his age, and I even bought shirts up a size so he'd be able to wear them for a while. I did pre-wash both the pillow panel and the t-shirts.  I'm not normally a pre-washer, but since this is clothing, I thought that I should get any shrinkage out of the way before adding the applique to the shirt.


Any of these images would look great on a sweatshirt or on the back of a jacket.  Or, as Jennifer's mom proved, on an apron


I know the assignment was "something other than a pillow" but I could not resist making the pizza rat pillow.  Fire Monkey (my son) loves it!  I put flannel on the back so it is nice and cuddly.  Cuddly for a rat, anyway!  😀


Be sure to check out all the ideas for making non-pillow items with the pillow panel from Gotham Quilts!

November 1: Jen Strauser * Dizzy Quilter

November 2: Swan Sheridan * Swan Amity Studios

November 3: Lissa LaGreca * Lovingly, Lissa

November 3: Emily Leachman * The Darling Dogwood ⮜ You Are Here!

November 4: Deborah Fisher * Fish Museum and Circus

November 5: Siobhan Fitzpatrick * CDM365 Studios

November 5: Autumn Shatto * Geometry And Joy

November 6: Laura Piland * Slice of Pi Quilts


Monday, September 19, 2022

Car Pillow

Over the weekend, I went to visit a friend and former colleague who had a baby over the summer.  I was able to finally take Totally Triangles to its adorable new owner.  Baby Girl has an older brother, aged 2 1/2 years.  When I give a baby quilt to a new arrival with an older sibling, I like to make something small for the older child as well.  I know young Michael loves cars and trucks, so I made him a pillow.

I cut the cars with my Accuquilt Go--the Cute Car is a super fun die.  I loved the roads I made as the borders for my Row by Row back in February, so I added a border of roads as well.  I am pleased to say that Michael loved it!  When he realized that the outer border was a road, he immediately went looking for his small trucks and had them drive on the road.  He also wanted to put his pillow on the couch and made me move the throw pillow next to me to make room for the car pillow.  I call that success!

Thursday, August 18, 2022

Time to Quilt! A Marvelous Mini

For August, Island Batik challenged their ambassadors to make a Marvelous Mini.  We could use any techniques, the only stipulation was that it be no larger than 24" square. I have long wanted to make a quilted clock and this seemed like the perfect time. 


The products featured in this post were given to me by Island Batik, Hobbs, Schmetz, Aurifil, & Prairie Spirit Alpaca.


A Dresden block seemed perfect, and the more I thought about it, the more I wanted to make a color wheel.  As I've said before, no one can do a rainbow like Island Batik! I went through my scraps and collection of stash builder strips to choose the best color wheel I could.  I used the Chunky Dresden template from Julie of Crafty Quilter.  While I was cutting the blades, I decided to make more than one Dresden since the blades use so little fabric.  The red-orange was my limiting factor; I could only get three blades out of it, so three clocks it is!  The blades after being chain-pieced made a beautiful garland!

Once I pressed all my blades on my alpaca pressing mat from Paririe Spirit Alpaca, I assembled my fans.  I did all piecing and quilting with Schmetz needles. I decided on solid gray for the background and center circle.  I used an Elmer's disappearing purple glue stick to keep the Dresden in place while I stitched around each blade with Aurifil monofilament thread.  Then I switched to Aurifil #6726 Airstream for the quilting. 


The numbers were the hardest part.  I used to do a lot of rubber stamping and I still had a set of small number stamps.  I tested on some scrap and liked it, but then when I stamped on an actual wheel, it bothered me that the stamps didn't really show up well on a few of the darker colors, like the purple. 


I ended up printing out bubble letters from online, using a copier to get them to a size I liked, and then used my light box to trace them backwards so I could print onto heat-n-bond light printable sheets.  I then ironed onto Island Batik solid black fabric. The numbers are small enough that I did not stitch around them after fusing; I'm assuming they won't get much handling since the clock will presumably hang on a wall or be propped on shelf. 


Though the fabrics are all the same, I varied the starting color.  The one for me, I used purple as the 12.  The second clock is a birthday present for my friend Kate, whose amazing photographs I sometimes use here.  Kate's favorite color is blue, so her clock has blue in the 12 o' clock position.  For the third, I stuck with Roy-G-Biv and used red as the start of the wheel.I quilted each clock slightly differently.  The battings are also different, though they are all by Hobbs.  Since this was a small project, I was able to use up smaller bits.  The clock with the red 12 has Hobbs' fusible batting, which I absolutely love because it cuts out the need to baste.  The clock with the blue 12 has Hobbs bleached 80/20 batting and the purple 12 has their Thermore 100% polyester batting.  


solid gray on the back, quilting from the Dresden blades

I bought 14" artist's canvases and Husband helped me staple the quilted sandwich to the canvases.  If I had it to do over again, I probably wouldn't have layered and quilted the clock, I would just staple the top to the canvas.  The bulk of the batting plus top & backing made for a lot to staple, especially in the corners.  The clock mechanisms were pretty easy to install. 

I'm so happy with my finished clocks!  Marvelous Mini was a fun challenge!