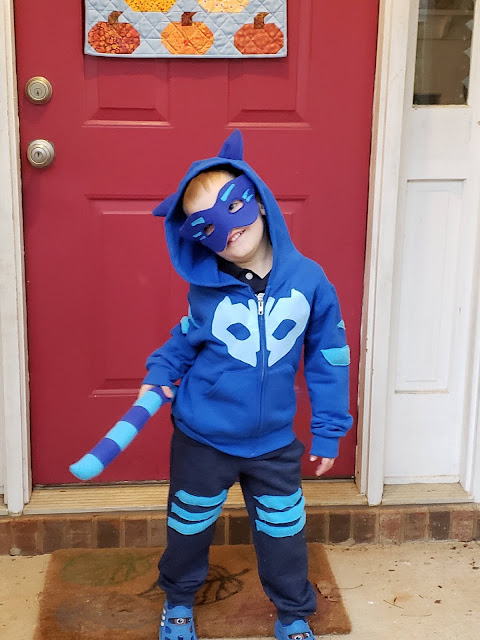
The stripes on the pants and sleeves were the hardest part because I had to get into the sleeve or pantleg to sew. Yes, the pants and sweatshirt aren't the same blue but I don't think that actually matter. I was worried about the tail but am really pleased with how it turned out.
The mask was probably the most fun. I found this great Bernina tutorial and used their template but not their method. (Their tutorial makes a reversible mask. I didn't need mine to be that fancy; I don't expect him to wear it for more than 5 minutes.) The mask is made of fleece. I did one layer of fleece with one layer of fusible interfacing on the back. Then I satin stitched around the lines for the eye holes. Once I finished the stitching I cut out the inside. This should finish it enough that it won't fall apart since it's fleece and not cotton.
And then it was time for the my most ingenious discovery--pre-made bias binding makes perfect mask straps!!! The tutorial has you sew strips into tubes and turn them inside out--no thanks! I stitched the fold in the binding closed, then sewed it to both sides of the mask. I cut the strip in half and measured against Fire Monkey's head to know where to put the velcro.
My super fabulous sister-in-law wraps presents with bias binding instead of ribbon. When I commented on how much I loved this, she told me I was the first person who actually knew what it was! She says she can get bias binding packages for 5 cents each at her thrift stores. This was the binding that wrapped Fire Monkey's birthday present earlier this month--is that not a perfect color match?!?
So here is Catboy, ready to trick-or-treat and hoping the expected storm is not as bad as anticipated. Creating Fire Monkey's costume was #4 on my Q4 list of goals for the Finish Along.
Time to be a Hero!


